Step One - What you'll need to start:
- Be sure you have a Subscription or trial of Investor/RT.
- Make sure your Linn Software subscription includes CQG Market Access. Click here to learn what CQG Market Access is and why you need it. There is no charge for CQG access while you are on trial. Please note that the CQG market data access subscription is a "technology" fee (required by CQG for 3rd-party software accessing their servers): it doesn't include any market data subscription for any futures market (which must be subscribed through your brokerage firm).
- It is recommended but not required that your Linn Software subscription includes DTN Market Access. This is a Historical Data service backed by DTN and marketed by Linn Software. This is a more robust historical data service that supports longer-term tick data and intra-day interval data than CQG provides. Click here to learn more about DTN Market Access. There is no charge for it while you are on trial.
- Sign the CQG End User License Agreement. (You may be prompted to login first)
- An account with a CQG supported broker or a trial of one. We'd prefer your trial be with an actual broker so that at the conclusion of the trial, the transition to a live funded account is seamless. If you do not yet have a broker, you can obtain Linn Software CQG demo credentials here.
- If you already have a Brokerage account that utilizes the CQG Order Routing system, contact your broker and verify that the CQG vendor label LinnSoft is enabled on your account. CQG credentials for use with Investor/RT are available from many FCMs, including ADM Investor Services, Advantage Futures, AMP Global Clearing, Dorman Trading, Phillip Capital and Plus500.
- Reminder: by default, CQG only allows one connection to your trading account at a time. If you wish to connect Investor/RT and one of CQG's native platforms (such as CQG QTrader, Desktop or Mobile) simultaneously, you should contact your brokerage firm to see if they can provide a second login ID (see more information at the end of this page). Please note that StoneX users don't face this restriction and can connect to the StoneX web-based futures trading platform (derived from CQG desktop) and Investor/RT at the same time. As long as their real money account is funded, they also have access to a free demo account, which is a great solution for getting sue to the polatform and test any of the semi or fully automated trading feature of Investor/RT.
Step Two - Start Investor/RT for the first time.
- Download Investor/RT and run the installer. Make sure to right click on the installer file and select Run As Administrator. Then start Investor/RT.
- If you're running for the first time, you will see the Setup Wizard as shown below. If you do not see it, go to File > Functions > Setup Wizard and press Go to start it:
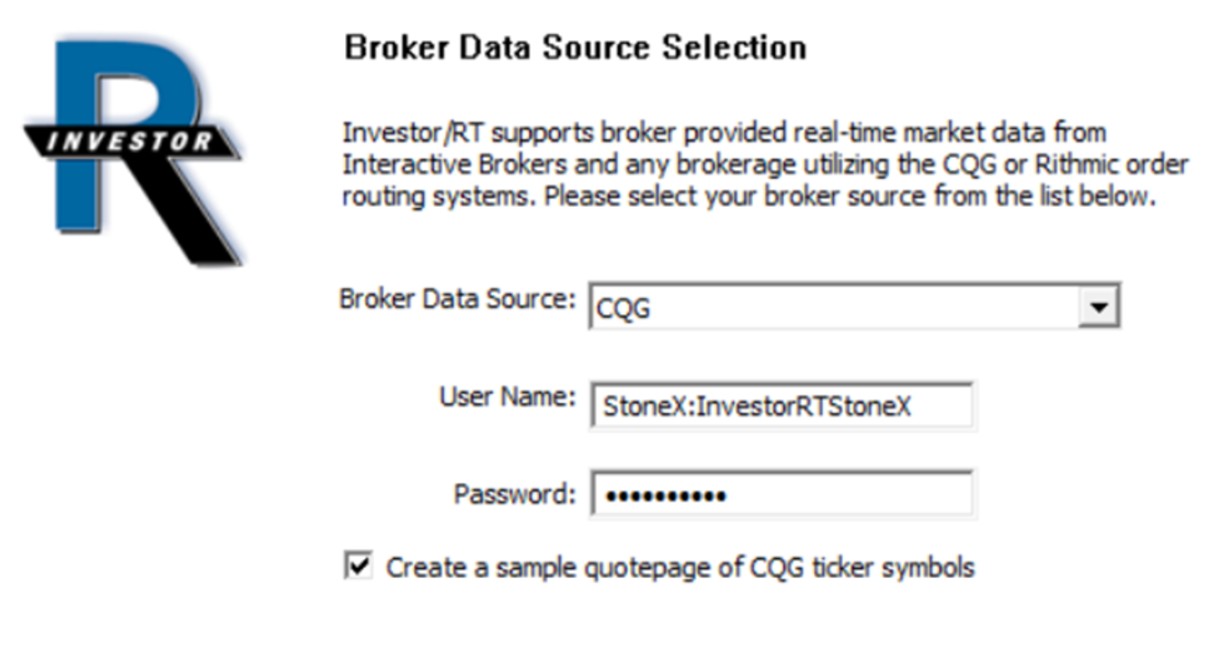
- Select Broker Source and press Next and the Setup Wizard will guide you through the process of setting up your feed, adding a list of symbols for CQG and activating your license. If you have subscribed to the DTN MA historical backfill services, it will be automatically activated after your license confirmation.
- In the Setup CQG continuum window, do check the "on login drop concurrent session" if you have only one single login attached to your CQG account (this is the default situation)

- Note : for StoneX users only, you need to type in StoneX: in front of your CQG username in the Setup CQG continuum window (StoneX CQG subscribers require I/RT release 16.1or later version)
- When the Setup Wizard is complete, Investor/RT will automatically restart. Go to step 3.
Step Three - Activate your License.
- Go to File > License to open the License window. If the window is filled out already and you see a green text string indicating you are activated, you can close the window and skip the rest of this step.
- In the license window, fill in your name and the email address you used to setup your account. Then retrieve your License code and User ID from the Licenses Tab of your User Dashboard and fill those in and press Activate.
- Follow the prompts through the activate process to complete activation.
Step Four - Resources you'll want to read to get up and running fast
- Getting started with Charts : Watch this 10 min "Chart essentials" video, review this Quick Start guide and learn how to easily import an existing chart defintion
- Getting started with Indicators : Watch this 10 min "Indicator essentials" video
- Finally, scroll through this summary of the most important page of this website to discover other key features
Note: In the Data menu, Data > Setup CQG..., there is a checkbox labelled "On Login Drop Concurrent Session". Check that box, click OK, and start the data feed ( Data > Start Data). This will clear any existing session and permit Investor/RT to create a new session. Are you running any other software at the same time using the same login credentials? If so, that software will be logged off, and Investor/RT will be able to log in. If unchecked, this means that when you log in and CQG finds that you are already logged into your CQG account using another application (such as the native CQG-App), it checks to see if your account permits a second active session to be started. Some brokerages (such as AMP or NinjaTrader) provide, upon request (for a fee), a second login to your CQG account so that you may maintain a simultaneous connection to your account from 2 separate applications. Please note however that you may be requested to pay exchange market data fees twice.